K:04 Series
K:04

K:04 is a wireless mechanical split keyboard with a modular hot-swap system, 58 programmable keys, and support for a trackball, touchpad, or encoder on either half
K:04 Mini

K:04 Mini is a compact version of the K:04 wireless mechanical split keyboard with 46 programmable keys and support for a trackball, touchpad, or encoder on either half
K:04 Mini

K:04 Micro is an ultra-compact version of the K:04 wireless mechanical split keyboard with 36 programmable keys and support for a trackball, touchpad, or encoder on either half
Overview
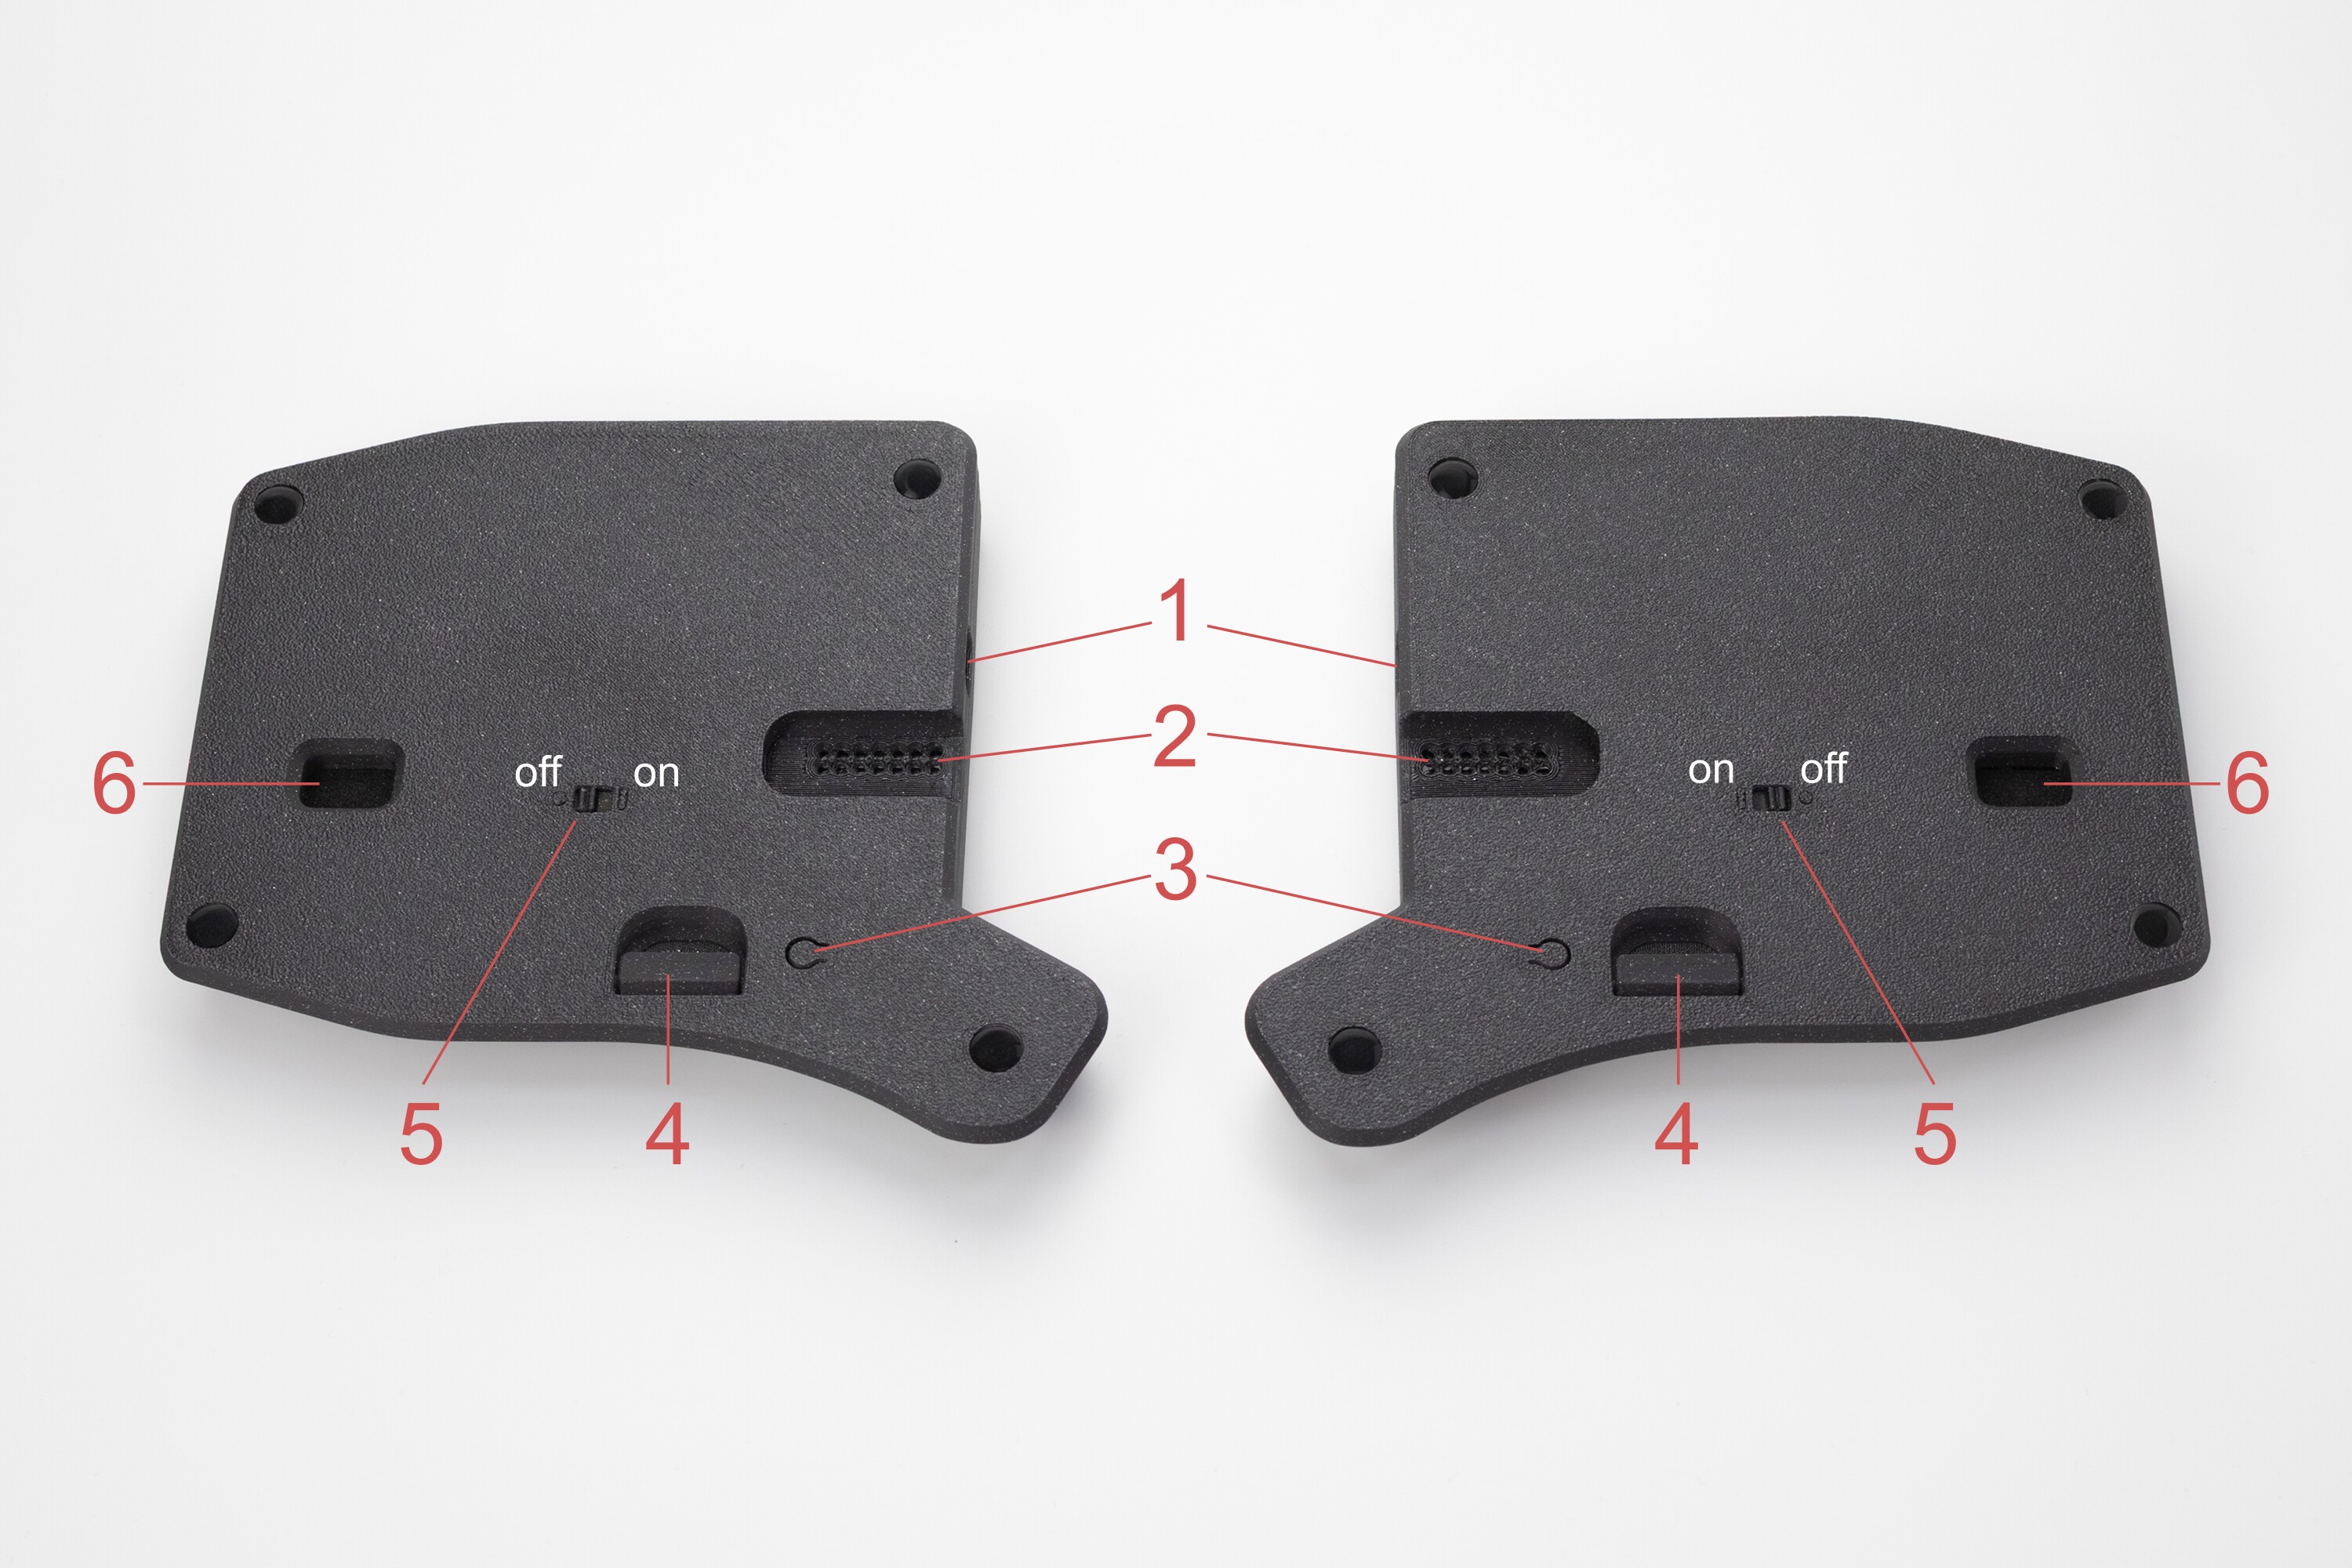
- USB-C connector
- Hot-swap socket for modules
- Button: single press — reset, quick double press — bootloader
- Case cover plug for use without modules
- Keyboard power switch
- Auxiliary window for disassembling the keyboard case
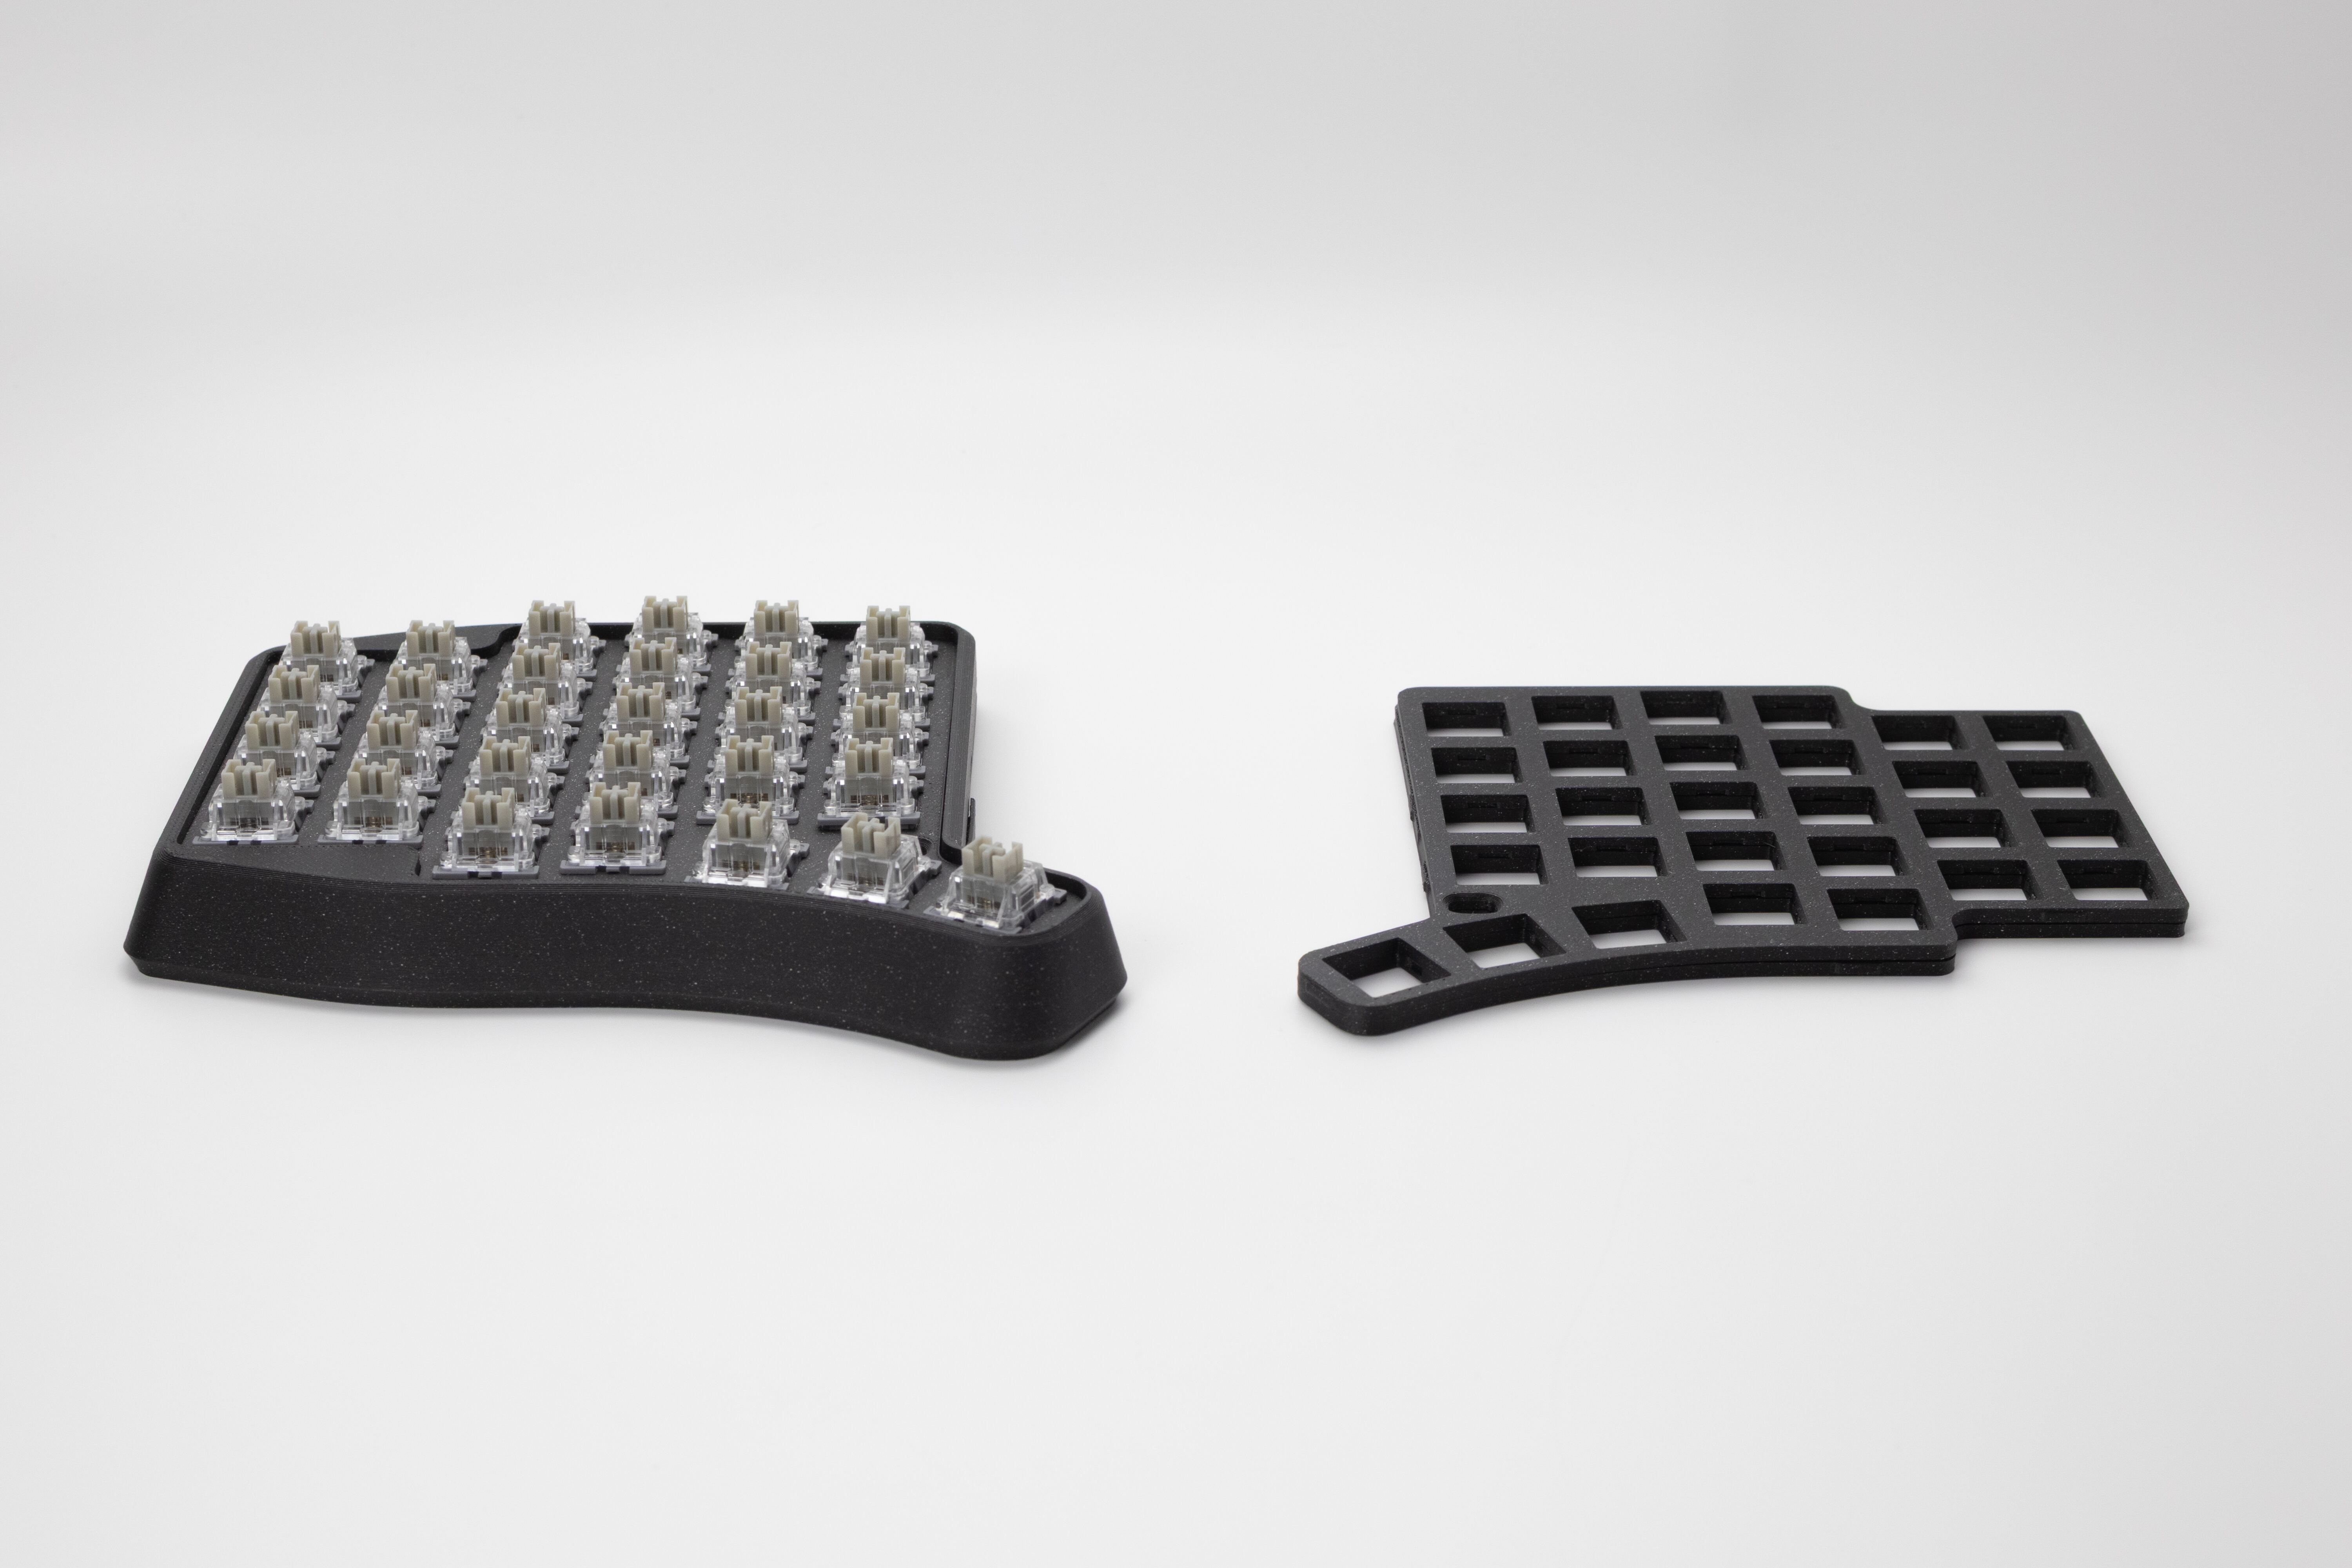
Additional switch plate
K:04 Series keyboards come with a switch plate for low-profile Gateron Brown/Red KS-33 LP 3.0 switches installed by default
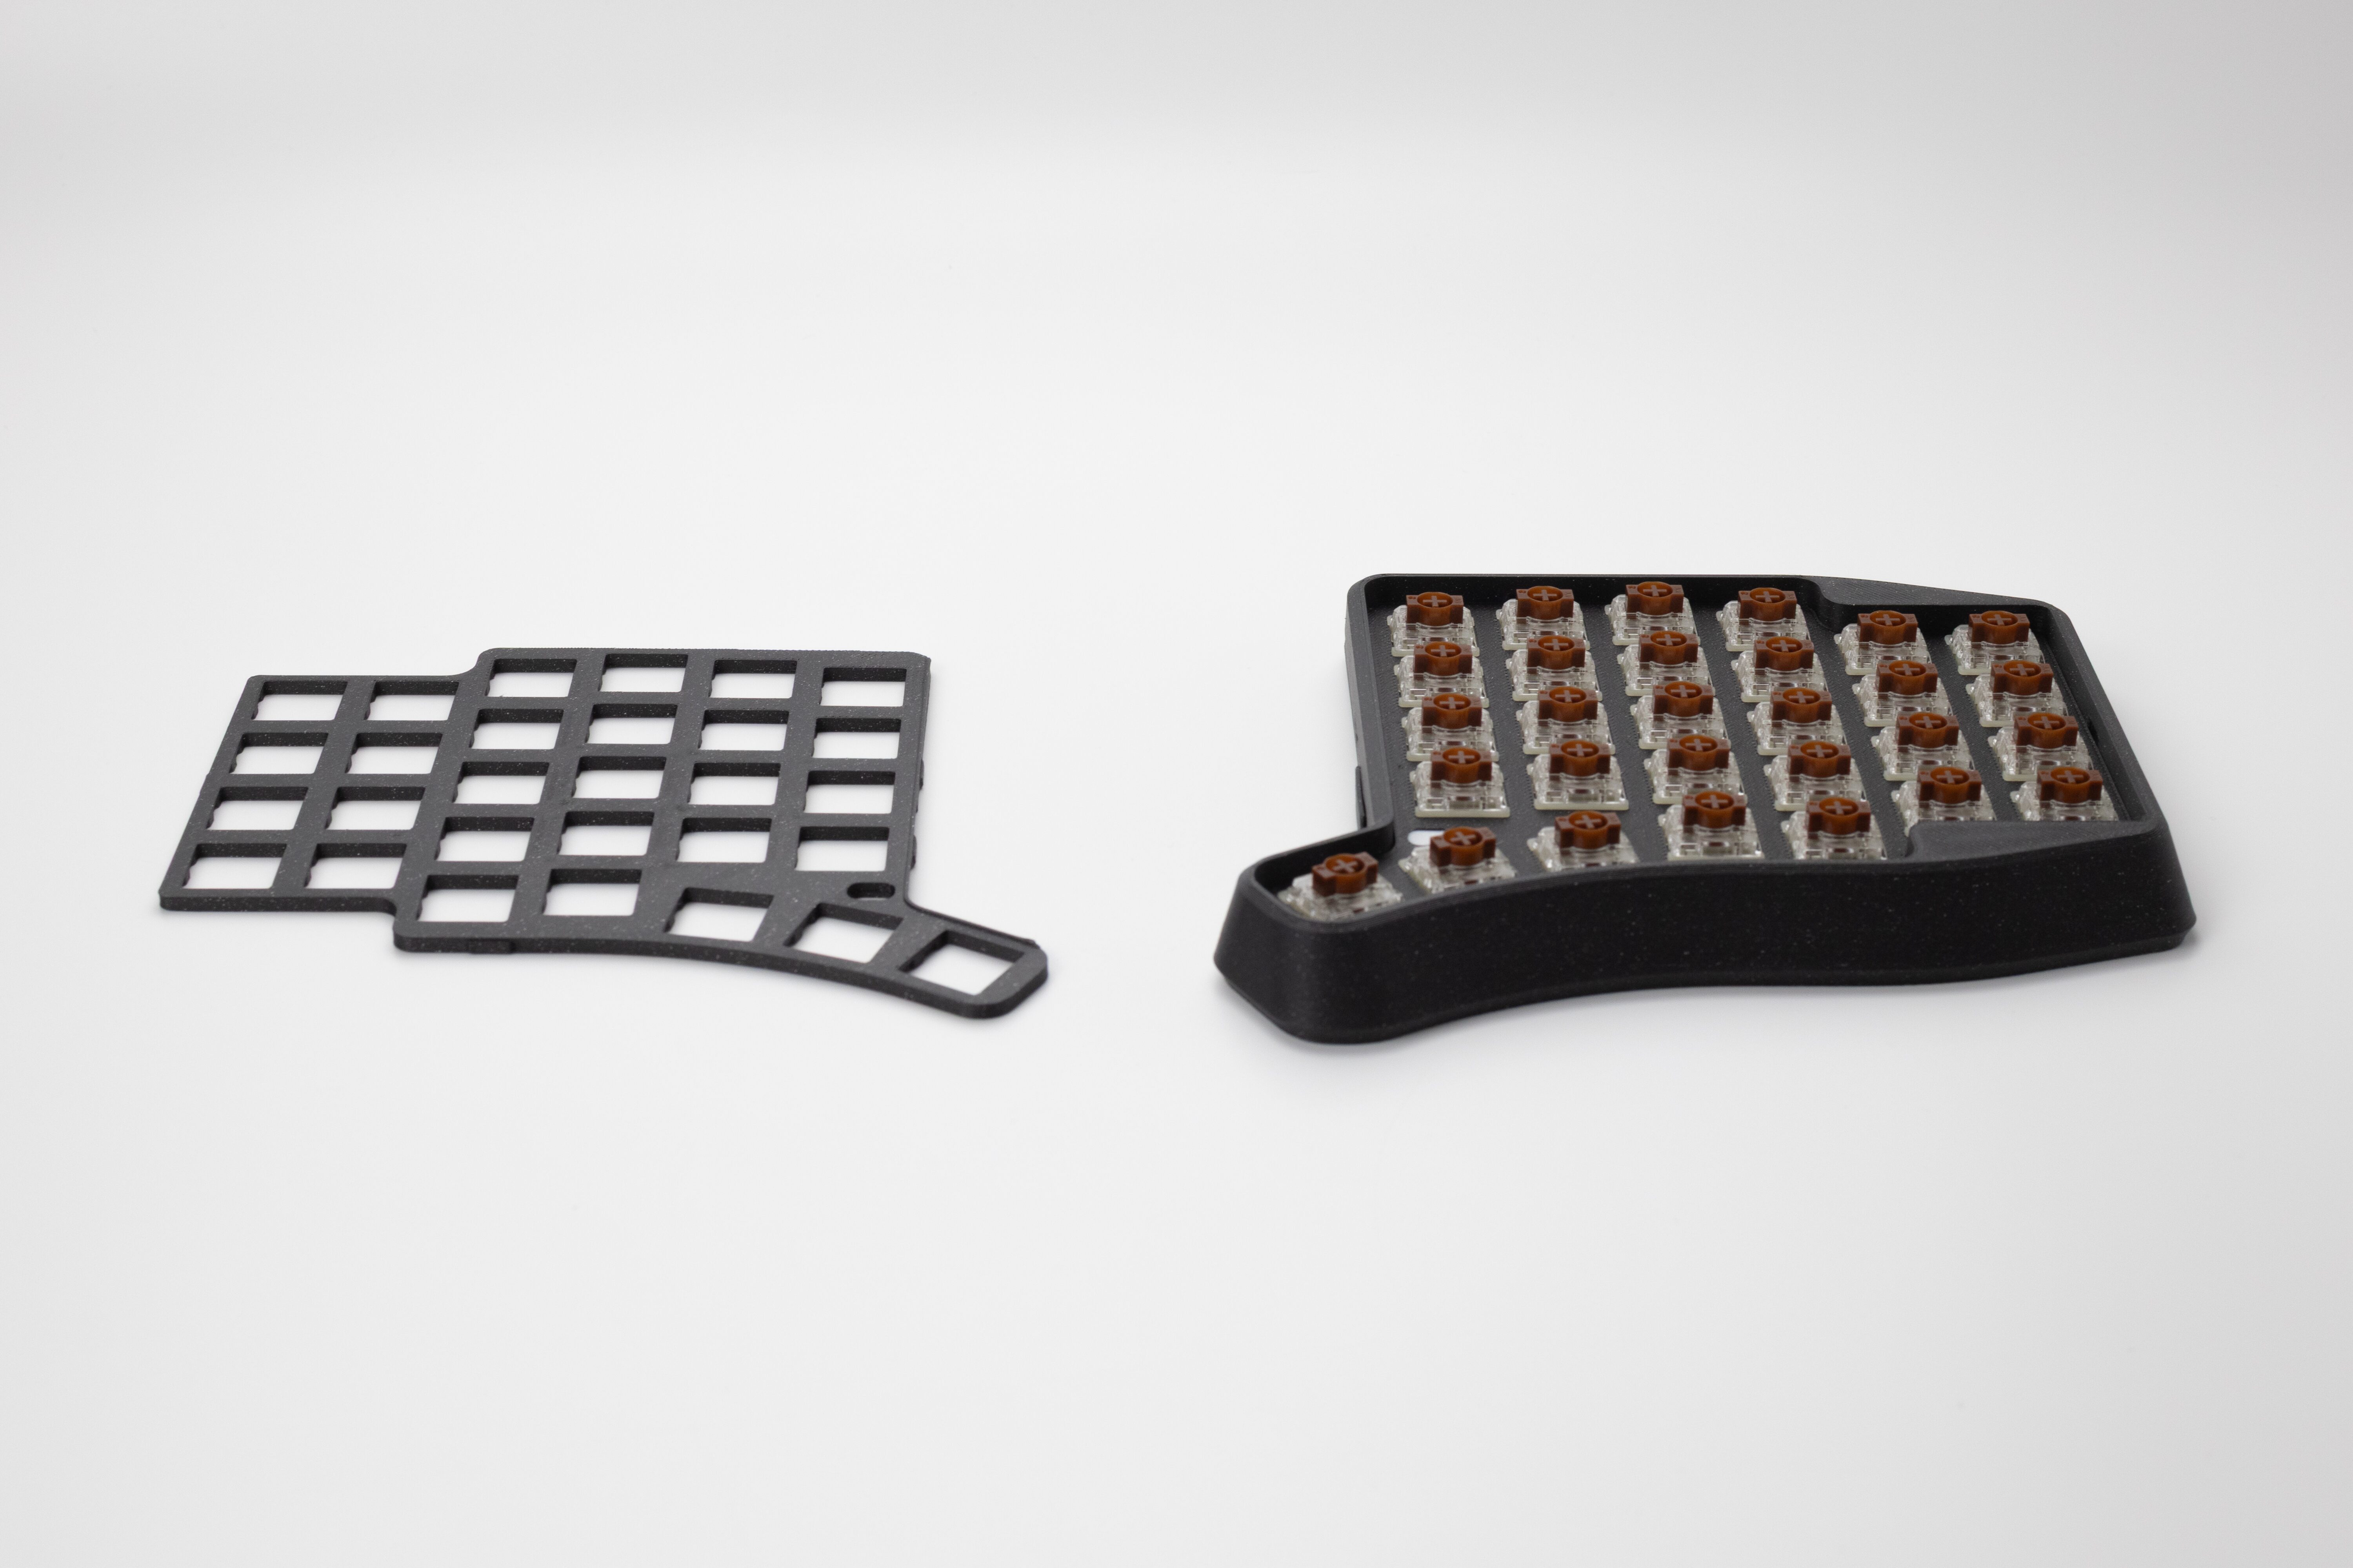
If you use mid-profile MX switches, install the additional switch plate included in the kit
LED indication
Each half of K:04, K:04 Mini, and K:04 Micro has an RGB indicator. Brightness and colors are configured in Entropy. Set LED brightness to 0 to turn the indicators off
Without Qube
Normally, the indicators show the color of the active layer 0–15. LED timeout applies to the base layer; set it to 0 to disable the timeout. Other layers stay lit while they are active
- Switching BT profiles — the indicator shows the selected profile color for one second. Defaults: BT0 — red, BT1 — blue, BT2 — yellow, BT3 — green, BT4 — purple
- Cyan blinking — the keyboard is ready to pair with a new device
- White blinking — the keyboard is reconnecting to a known device
- Yellow blinking — a half is searching for the other half
- Green for one second — the other half or the computer has connected
- BT Battery key — each half shows its own charge level for one second: 0–20% in red, 21–40% in orange, 41–74% in yellow, and 75–100% in green
- Short red blink every two seconds — the half has 20% charge or less and is not connected via USB-C
- Charging via USB-C — the indicator is yellow, then turns green at 95% or higher. A non-base layer color takes priority
- Sleep mode — the indicator turns off unless the half is connected via USB-C
After a temporary signal, the indicators return to the active layer color
With Qube
Only the main signals are shown on the halves:
- Active layer color
- Yellow blinking — a half is searching for Qube
- Green for one second — a half has connected to Qube
- Charging via USB-C — the indicator is yellow, then turns green at 95% or higher. A non-base layer color takes priority
- Sleep mode — the indicator is off
- Qube was not found — the indicator turns off when the search ends
The BT Battery key refreshes the battery levels on the Qube display. The LEDs on the halves do not show BT profiles, Bluetooth status, the battery-level color scale, or low-battery warnings. LED timeout is not used with Qube in version 0.1.3
Connection
- K:04 works with devices running Windows, macOS, Linux, Android, and iOS
- The keyboard connects via Plug and Play (PnP); no additional driver installation is required
- The keyboard ships ready to connect to your device with the firmware current at the time of purchase
Wired connection
The keyboard supports wired connection via USB-C. Use the included cable or any other USB-C cable that supports data transfer
Wireless connection
- Turn on both halves of the keyboard — the halves are already synchronized with each other
- Select a connection profile on the keyboard — if you need to connect to multiple devices, you can skip this step for the first connection
- Connect the keyboard to your device — enable Bluetooth on the device, then pair it in the device settings
Connecting additional devices
- Enable Bluetooth on the device you want to connect the keyboard to
- Turn on the keyboard by switching the power switches on the bottom covers of both halves to the ON position — the keyboard will enter pairing mode
- Switch the BT profile on the keyboard using the corresponding keys (layer 3 in the default layout)
- Start a Bluetooth search on your device and find the keyboard in the list
- Connect the keyboard to your device
Charging, Charge Monitoring
- use the included USB-C cable or any other USB-C cable to charge the keyboard
- a full battery charge takes about 1.5-2 hours
- without Qube, check the charge level of each half using LED indication (the BT Battery key); with Qube, check it on the Qube display
Modules
K:04 supports a modular system for both keyboard halves
- Ball size: 32 mm
- Scroll Mode for smooth scrolling
- Sniper Mode for precise cursor control
- Text Mode for convenient text navigation
Modular System Connection Notes
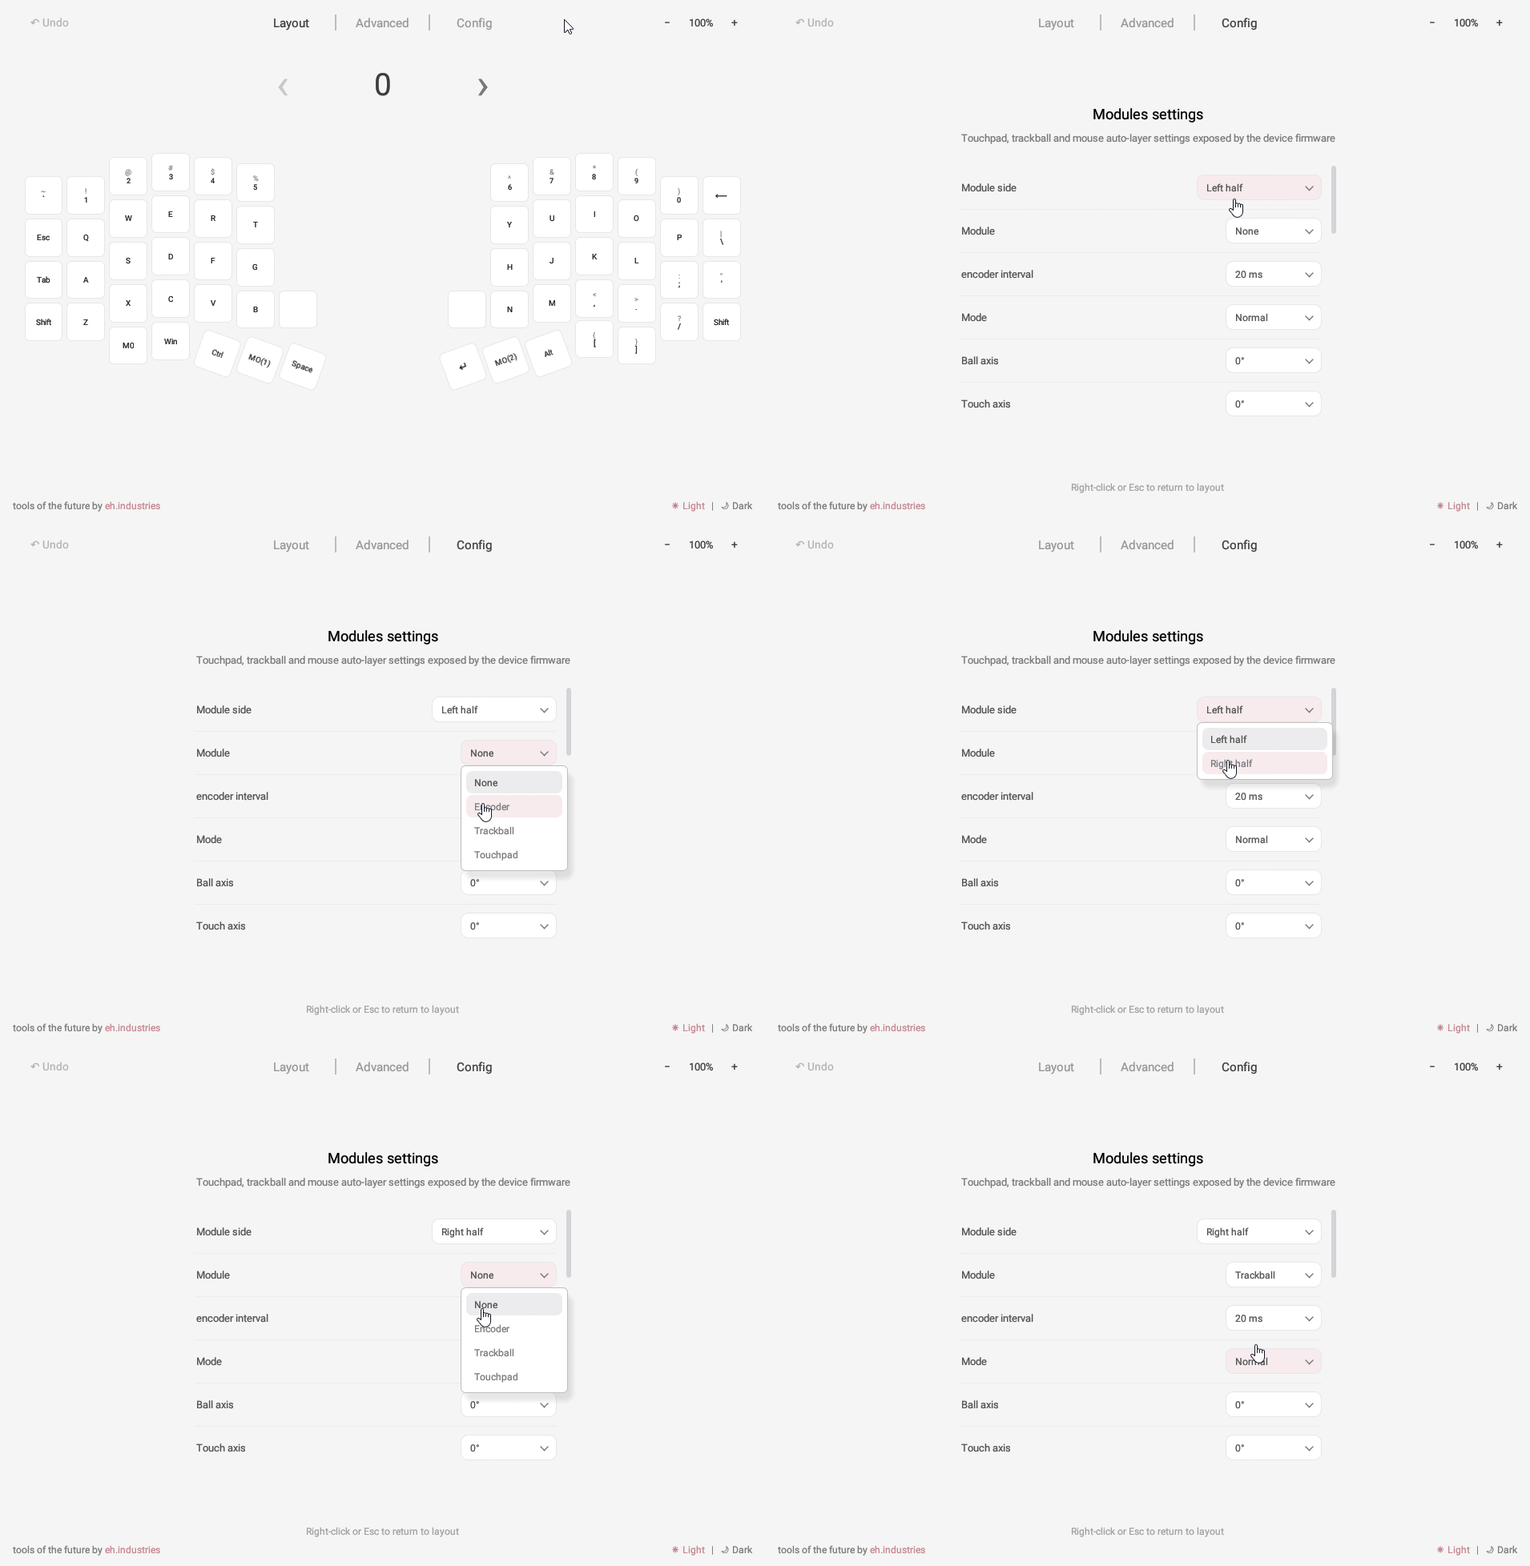
- after replacing one module with another, select it in Entropy under Config - Modules settings
- modules can be installed into the sockets on either half without reflashing
- when replacing one module with another, the configuration is preserved
- identical modules can be used on both halves
- if no module is installed, the socket is covered with a neat plug
- each module is configured separately for each half
Configuration
Use the Entropy graphical configurator to remap keys and configure the keyboard
Module configuration
To use the encoder, touchpad, or trackball module, enable it in the keyboard settings. Open the Entropy configurator, select Config - Modules settings at the top of the main configurator window, choose the required half under Module side, and choose the connected module under Module
Firmware Update
Firmware files and update instructions are available here
Care and Maintenance
- Periodically clean the case from dust and dirt using a dry or slightly damp cloth
- For the trackball module: keep the ball, ceramic bearings, and ball socket clean
Support
The keyboard comes with a 3-year warranty and service support
If you have any questions about setup, firmware, or operation, please contact the Ergohaven Telegram group or knowledge base